A TRS-80 Color Computer Photo Filter with 4 colors.

Following the previous post, this is a photo filter using the TRS-80 Color Computer’s higher resolution graphics.

Resolution: PMODE 1,1 has 128 x 96 pixels on the screen. I have used a grayscale photograph resized to 128 x 96.

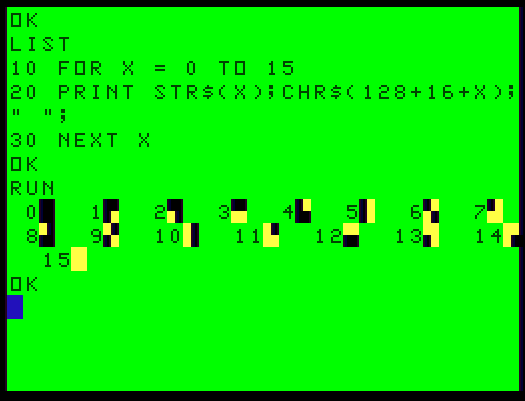
Colors: PMODE 1 has two sets of four colors: [green, yellow, blue and red] and [buff, cyan, magenta and orange].

This program loops through each pixel in the grayscale photograph and converts it to a value representing one of the available four colors, depending on how dark the original pixel is. I am using yellow, green, red and blue to represent light to dark.

In PMODE 1 graphics represent bytes that store values for four pixels in a horizontal row. Two bits for each pixel represent its color:
00b or 0 is green. [or buff]
01b or 1 is yellow. [or cyan]
10b or 2 is blue. [or magenta]
11b or 3 is red. [or orange]

00011011 is a byte representing a green pixel, yellow pixel, blue pixel and red pixel.
00000000 4 green pixels
11111111 4 red pixels
01010101 4 yellow pixels

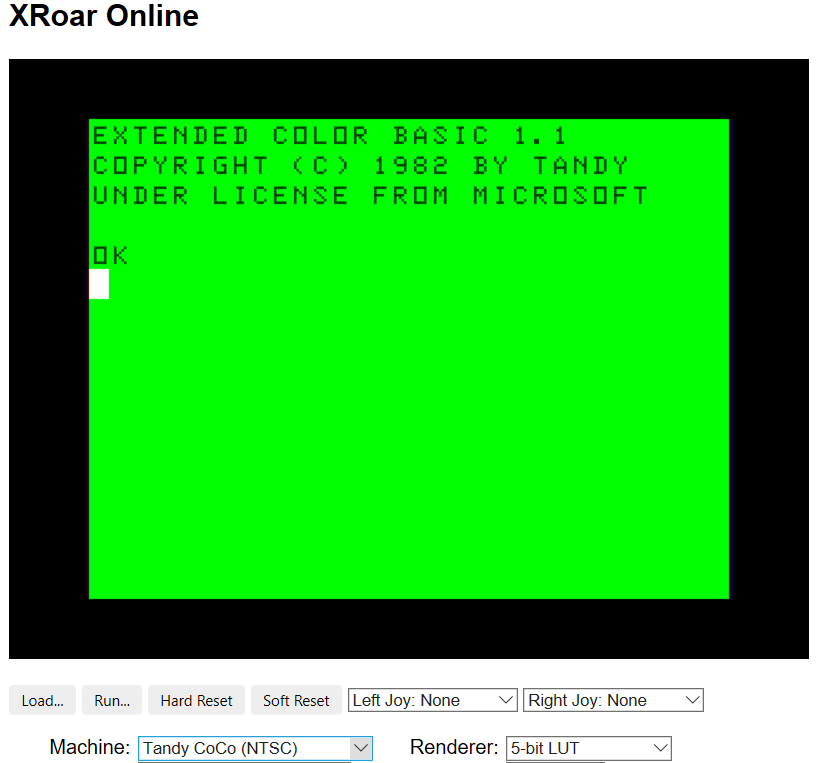
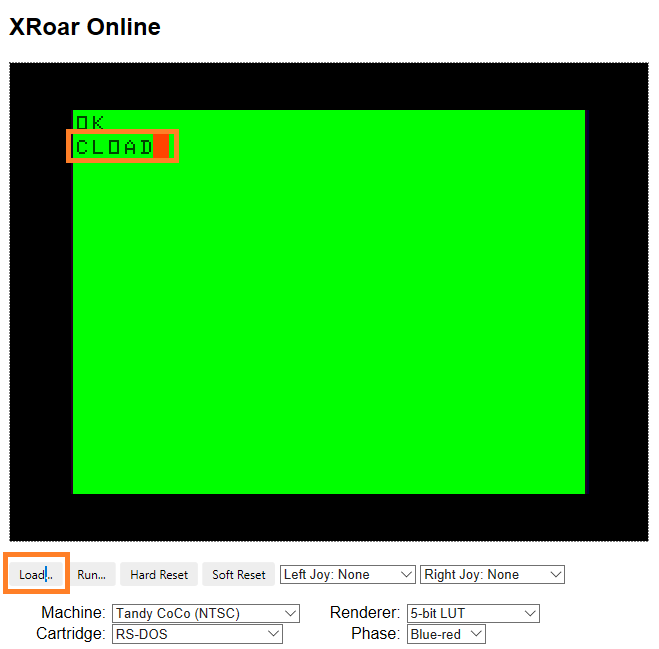
What is a little different from the previous program is POKE is used to store the byte values into video memory of the TRS-80. Storing the byte values in DATA statements rather and individual POKE statements made the program smaller and faster to load and run. Below is the python to generate the program. Here is the Color Computer program I load into XRoar Online.

def pixel_to_bit(pixel_color):
    #green,yellow,blue,red
    if pixel_color<48:
        #red 10
        color_bits=2
    if pixel_color>=48 and pixel_color<96:
        #blue 11
        color_bits=3
    if pixel_color>=96 and pixel_color<150:
        #green 00
        color_bits=0
    if pixel_color>=150:
        #yellow 01
        color_bits=1
    return color_bits

file = open('C:\\a_orgs\\carleton\\data5000\\xroar\\drawjeff_pmode1.asc','w') 
file.write("1 PMODE 1,1\r ")
file.write("2 SCREEN 1,0\r ")
for row in range(0,96,1):
    file.write(str(linenum)+" DATA ")
    for col in range(0,127,4):        
        
        linenum = 10+row*96+col
        #PMODE 1 - Graphics are bytes that store values for 4 pixels in a horizontal row
        # 2 bits for each pixel represent its color.
        # 00b 0 green or cyan
        # 01b 1 yellow or 
        # 10b 2 blue
        # 11b 3 red
        # 00011011 is a byte with a green, yellow, blue and red pixels
        # 00000000 4 green pixels
        # 11111111 4 red pixels
        # 01010101 4 yellow pixels
        byte_val=0
        for byte_col in range(0,4):
            color_bits=pixel_to_bit(resized128x96[row,col+(3-byte_col)])
            byte_val=byte_val+(color_bits*(2**(byte_col*2)))
        #memory_location = int(1536+(row*(96/4)+(col/4)))
        file.write(str(byte_val))
        if(col<124):
            file.write(",")
    file.write("\r ")

file.write("9930 FOR DC=1 TO 3072\r ")
file.write("9935 READ BV\r ")
file.write("9940 POKE 1536+DC,BV\r ")
file.write("9950 NEXT DC\r ")
    
file.write("9999 GOTO 9999\r ")
file.close()
A four color filter.

An 80’s Themed Image Filter for Photographs.

This week in our seminar for HIST5709 Photography and Public History we discussed a reading from Nathan Jurgenson’s The Social Photo. He describes the use of image filters to give digital photographs an aesthetic that evokes nostalgia and authenticity. Below is a description of a retro image filter inspired by the Radio Shack Color Computer.

I was very fortunate that my parents bought this computer when we moved to Ottawa in 1983. I learned a lot using it and I used it a lot. As much as I loved it, I found its basic graphic mode odd. Coloured blocks were available, but instead of being square they were about 1.5 times tall as they were wide. (See a list of the yellow blocks below.)

While I used these blocks for a few purposes, like printing large letters, their rectangular shape made them less satisfactory for drawing. Still, they are distinctive. I wanted to see if I could make an image filter with them and evoke a sense of the 1980’s.

I used the Xroar emulator as a virtual Color Computer rather than going fully retro and using the actual machine. See: https://www.6809.org.uk/xroar/. It takes a few steps to set up on a computer. There is an easier to run on-line version of the CoCo at: http://www.6809.org.uk/xroar/online/. To follow along, just set Machine: “Tandy CoCo (NTSC)” in the menu for XRoar Online.

Above: Color Computer running on XRoar Online.

To see one of these graphical blocks, type in PRINT CHR$(129) and hit Enter in XRoar. (And note that the CoCo keyboard uses Shift+8 for ( and Shift+9 for ). Try a few different values like PRINT CHR$(130) or 141 and you will see rectangular graphics like the yellow blocks in the screen above.

Using these to represent a photograph provides a maximum resolution of 64 pixels wide X 32 pixels tall. (The screen is 32 characters wide with 16 rows.) I wanted to leave a row for text, so I used a resolution of 64 X 30. However, since the pixels are 1.5 times taller than wide I would use a photograph with an aspect ratio of 64X45 (30*1.5).

I used the picture below. It’s a screen grab my daughter took that has some contrast and could be used for my Twitter profile.

Raw image in grayscale. It’s 192X135 or 3 times larger than 64×45.

Here’s the Python code I used:

# import the necessary packages
# Credit to: Adrian Rosebrock https://www.pyimagesearch.com/
from imutils import paths
from matplotlib import pyplot
import argparse
import sys
import cv2
import os

import shutil
from pathlib import Path
img_local_folder = "C:\\xroar\\"
path = Path(img_local_folder)
os.chdir(path)
# 192X135 is used since it's a multiple of 64X45. 
img_file_name = "jeffb_192x135.jpg"
hash_image = cv2.imread(img_file_name)

# if the image is None then we could not load it from disk (so skip it)
if not hash_image is None:
    # convert the image to grayscale and compute the hash
    pyplot.imshow(hash_image)    
    pyplot.show()

    hash_image = cv2.cvtColor(hash_image, cv2.COLOR_BGR2GRAY)
    pyplot.imshow(hash_image,cmap='gray')    
    pyplot.show()

    # resize the input image to 64 pixels wide and 30 high.
   
    resized = cv2.resize(hash_image, (64, 30))
    pyplot.imshow(resized,cmap='gray')
    pyplot.show()
    
else:
    print("no image.")
A flattened 64X30 image.

Let’s convert this to black and white.

#convert the grayscale to black and white using a threshold of 92
(thresh, blackAndWhiteImage) = cv2.threshold(resized, 92, 255, cv2.THRESH_BINARY)
print(blackAndWhiteImage)
pyplot.imshow(blackAndWhiteImage,cmap='gray')
pyplot.show()
A black and white version.

This image needs to be translated in order to import in into the CoCo. We will turn it into a BASIC program of PRINT statements. Here is a sample of this very simple and inefficient program.

 150 PRINT CHR$(128);
 152 PRINT CHR$(128);
 154 PRINT CHR$(143);
 156 PRINT CHR$(143);
 158 PRINT CHR$(143);
 160 PRINT CHR$(143);
 162 PRINT CHR$(131);
 164 PRINT CHR$(131);
 166 PRINT CHR$(131);
 168 PRINT CHR$(135);

This program is generated by Python. Python loops through squares of 4 pixels in the black and white image. For each pixel that has a color of 255/white, the appropriate bit (top/bottom, left/right) on the rectangular graphic block is set to having color.

file = open('C:\\xroar\\xroar-0.35.2-w64\\drawjeff.asc','w') 
for row in range(0,30,2):
    for col in range(0,64,2):        
        linenum = row*64+col
        # bit 1 is lower left
        bit1=0
        # bit 2 is lower right
        bit2=0
        # bit 4 is top left
        bit4=0
        # bit 8 is top right
        bit8=0
        # if a pixel is white (255) - set the bit to 1 (green) else, the bit is 0 (black)
        if(blackAndWhiteImage[row,col]==255):
            bit8=8
        if(blackAndWhiteImage[row,col+1]==255):
            bit4=4
        if(blackAndWhiteImage[row+1,col]==255):
            bit2=2
        if(blackAndWhiteImage[row+1,col+1]==255):
            bit1=1
        chr = 128+bit1+bit2+bit4+bit8
        # write the statement into the program.
        file.write(str(linenum)+" PRINT CHR$("+str(chr)+");\r ")
    # write an end of line statement if line is less than 32 characters
    #file.write(str(linenum)+" PRINT CHR$(128)\r ")
file.close()

A sample of the generated program is here. To run it, in XRoar Online click Load and select the downloaded drawjeff.asc file. Then type CLOAD <enter> in the emulator. (See below.)

Loading will take a moment. Imagine popping a cassette into a tape recorder, typing CLOAD and pressing the play button. F DRAWJEFF will be displayed will the file is loaded.

This will appear during the loading of the file.

Once loaded, OK will appear. Type RUN.

A photograph image filter… Imagination required.

It’s neat that there is an on-line emulator for a computer from almost 4 decades ago. It’s also neat that Python can write programs that will run on it.

The book Getting Started with Extended Color BASIC is on the Internet Archive. I loved this book and think it’s an excellent introduction to programming. There are lots of ideas to try out on XRoar.